
Installing Grafinya Panel
Step by step: from an empty VPS to a connected iPhone. Takes 15–20 minutes, about 5 of which is building the image.
1Requirements
- A VPS with a public IPv4 from any provider: Ubuntu 22.04 / 24.04 or Debian 12.
- 1 GB RAM or more, ~5 GB of free disk space (the image is built on the server).
- root access or a user with
sudo. - Open ports 51820/udp (VPN) and 51821/tcp (web panel).
- Optional: a domain, if you want HTTPS for the panel (recommended).
| Port | Purpose |
|---|---|
51820/udp | VPN tunnel (Grafinya core) |
51821/tcp | web panel |
80, 443/tcp | only if you set up HTTPS with Caddy |
2Connect via SSH
On macOS and Linux open Terminal, on Windows — PowerShell or Windows Terminal. Your provider sends the IP and root password once the server is created.
ssh root@SERVER_IPAnswer yes to the host key fingerprint prompt on first connect. If you are not logged in as root, prefix the commands below with sudo or run sudo -i.
apt update && apt upgrade -y3Ports and firewall
Ports must be open in two places: in your provider’s control panel (cloud security group / firewall, if any) and on the server itself if ufw is enabled.
ufw allow OpenSSH
ufw allow 51820/udp
ufw allow 51821/tcp
ufw enable
ufw statusufw allow OpenSSH must come before ufw enable. If SSH runs on a custom port, allow that port.ufw rules. To hide the panel from the internet, closing 51821 in ufw is not enough — bind the port to 127.0.0.1 (see step 7, HTTPS option) or close it in the provider firewall.4Install Docker
The official script installs Docker Engine and the docker compose plugin:
curl -fsSL https://get.docker.com | shdocker --version
docker compose version5Download the panel from GitHub
Option A — git (easy updates)
apt install -y git
git clone https://github.com/grapelloid/grafinya-panel.git && cd grafinya-panel
Option B — ZIP archive
Without git: download the branch archive from GitHub and unpack it on the server.
apt install -y curl unzip
curl -L -o grafinya-panel.zip https://github.com/grapelloid/grafinya-panel/archive/refs/heads/main.zip
unzip grafinya-panel.zip && cd grafinya-panel-main
With option B you update the same way — by downloading a new archive. Your data is safe: it lives in a Docker volume, not in the folder.
6Start
There is no prebuilt image in a registry — it is built from source on your server. The first build takes 3–10 minutes: the Grafinya core is compiled.
docker compose up -d --buildCheck that the grafinya container is running (status Up, and healthy after a minute):
docker psFollow the logs (exit with Ctrl+C, the container keeps running):
docker logs -f grafinya7Panel access: HTTP for testing or HTTPS
By default the panel expects HTTPS: you can’t sign in over plain http:// (session cookies are secure-only). Pick one option.
Option A — quick, over HTTP (testing)
Open docker-compose.yml (e.g. nano docker-compose.yml), uncomment the environment block and set INSECURE=true:
services:
  grafinya:
    environment:
- INSECURE=truedocker compose up -dThe panel is now at http://SERVER_IP:51821.
Option B — domain and HTTPS with Caddy (recommended)
- At your DNS provider, create an A record panel.example.com → SERVER_IP and wait for it to resolve.
- Open ports 80 and 443:
ufw allow 80/tcp && ufw allow 443/tcp(and in the provider firewall). - Install Caddy — it obtains and renews a free TLS certificate automatically:
apt install -y debian-keyring debian-archive-keyring apt-transport-https curl gpg
curl -1sLf 'https://dl.cloudsmith.io/public/caddy/stable/gpg.key' | gpg --dearmor -o /usr/share/keyrings/caddy-stable-archive-keyring.gpg
curl -1sLf 'https://dl.cloudsmith.io/public/caddy/stable/debian.deb.txt' | tee /etc/apt/sources.list.d/caddy-stable.list
apt update && apt install -y caddy
Replace the contents of /etc/caddy/Caddyfile:
panel.example.com {
    reverse_proxy 127.0.0.1:51821
}systemctl reload caddyTo make the panel reachable only over HTTPS, bind port 51821 to localhost in docker-compose.yml and restart the container (keep INSECURE at false):
    ports:
      - "51820:51820/udp"
- "127.0.0.1:51821:51821/tcp"docker compose up -d
ufw delete allow 51821/tcpThe panel now opens at https://panel.example.com.
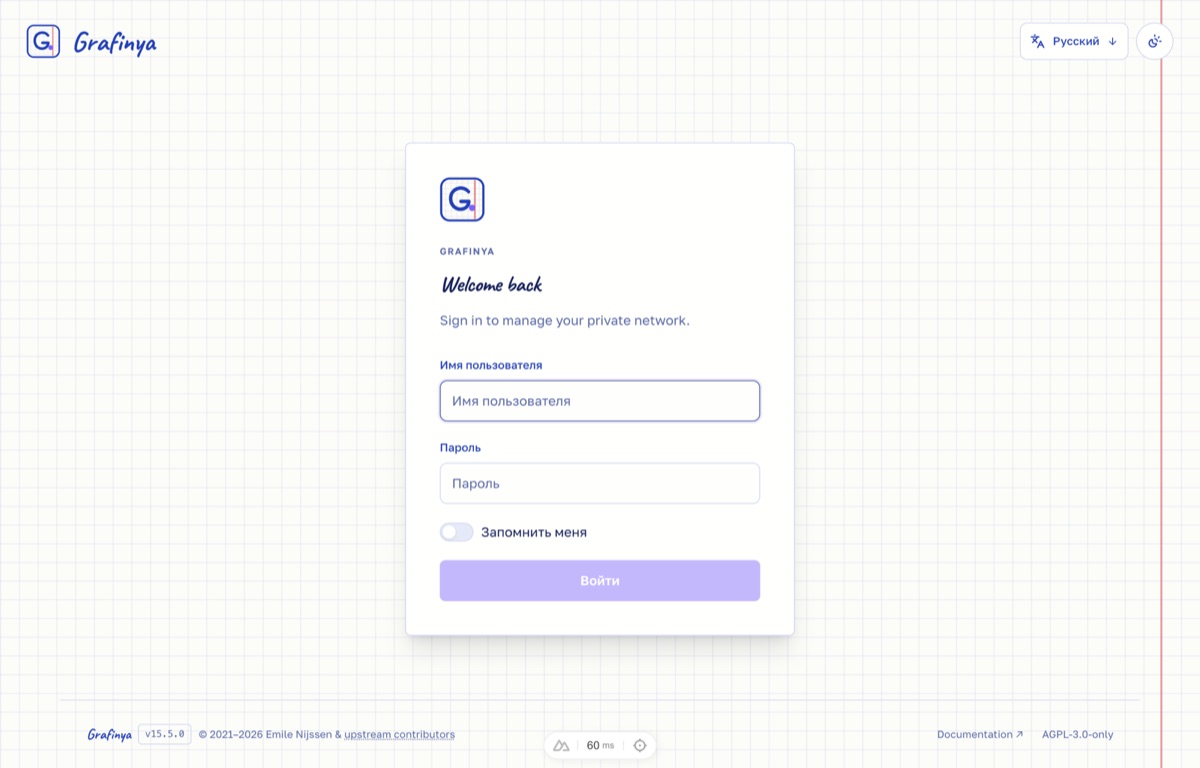
8First-run setup
On first visit the panel walks you through a setup wizard:
- Welcome → “Continue”.
- Administrator: a username and a strong password — at least 12 characters. Store it in a password manager.
- Existing setup? — “No” (unless you are restoring from a backup of an old server).
- That’s it: the server’s public address and VPN port
51820/udpare filled in automatically. Change them in the admin area (Configuration and Interface); the port must matchports:indocker-compose.yml.
In the admin area you can enable 2FA and adjust interface and traffic masking settings.
9Create a client and download .conf
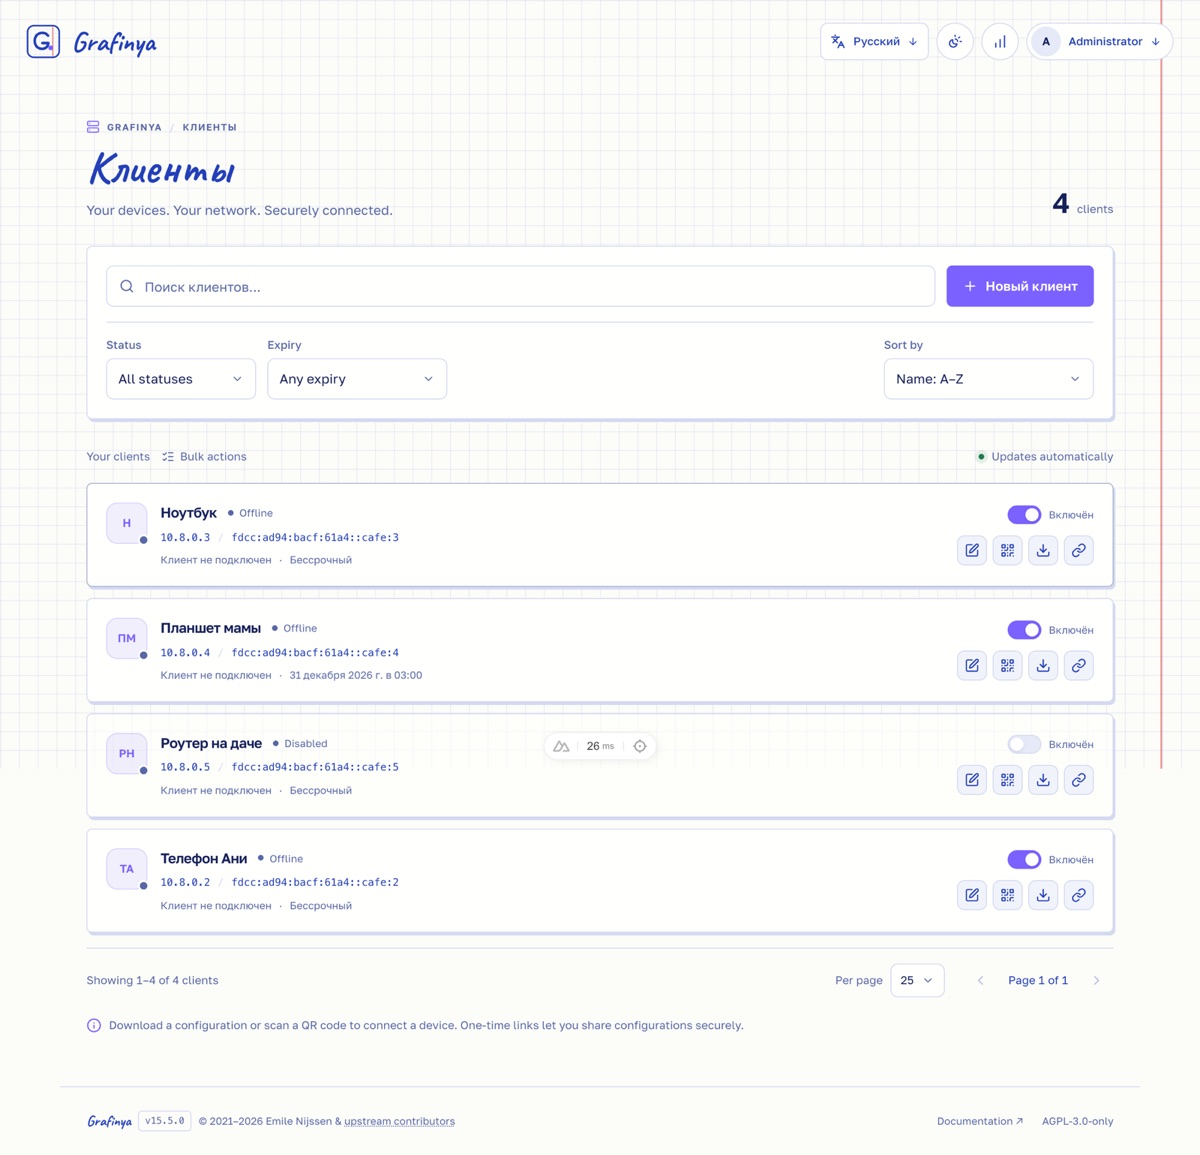
- On the Clients page click “New client”.
- Enter a name (e.g. “My iPhone”). Leave the expiry date empty for unlimited access; to extend access, just change the date.
- Click “Create client”.
- On the client card click the down-arrow button — “Download configuration”. You get a
.conffile.
Moving the file to your iPhone
- AirDrop — from a Mac straight to the iPhone, then “Save to Files”.
- Files / iCloud Drive — put the file in iCloud Drive on your computer; it shows up in the Files app.
- Email or messenger — send it to yourself and save the attachment to Files.
- Or open the panel in Safari on the iPhone and download the file — it lands in Files → Downloads.
10Connect in the grafinya app
- Open grafinya and tap “Choose file”.
- Pick your
.confin Files. - Flip the switch. On first connect iOS asks to allow adding a VPN configuration — tap “Allow”.
- We recommend turning on Kill Switch: Settings → Security. If the tunnel drops, internet access is blocked and your real IP won’t leak.
Check: open any “what is my IP” service in Safari — it should show your server’s IP. The panel shows the client as online with traffic counters.
11Updating
cd ~/grafinya-panel
git pull
docker compose up -d --build
The database, keys and settings live in the panel’s Docker volume and survive rebuilds. Clean up old images with docker image prune -f.
12Backup
All panel data is in the grafinya-panel_grafinya_data Docker volume (the name is fixed and doesn’t depend on the folder you cloned into). Archive it:
cd ~/grafinya-panel
docker compose stop
docker run --rm -v grafinya-panel_grafinya_data:/data -v "$PWD":/backup alpine \
  tar czf /backup/grafinya-backup-$(date +%F).tar.gz -C /data .
docker compose start
Copy the archive to your computer (run this on your computer, not on the server):
scp root@SERVER_IP:~/grafinya-panel/grafinya-backup-*.tar.gz .To restore on a new server, install the panel with steps 4–6, then:
docker compose stop
docker run --rm -v grafinya-panel_grafinya_data:/data -v "$PWD":/backup alpine \
  sh -c "rm -rf /data/* && tar xzf /backup/grafinya-backup-DATE.tar.gz -C /data"
docker compose start13Uninstall
Stop and remove the container, keeping the data:
cd ~/grafinya-panel
docker compose down
Remove everything, including the database, keys and all clients (irreversible):
cd ~/grafinya-panel
docker compose down -v --rmi all
cd ~ && rm -rf ~/grafinya-panel14Troubleshooting
The panel doesn’t open at http://IP:51821
- Make sure the container is running:
docker ps, and checkdocker logs grafinya. - Port
51821/tcpis closed in the provider’s security group / firewall — the most common cause. Open it in the provider’s control panel. - Test locally on the server:
curl -I http://127.0.0.1:51821. If it answers locally but not from outside, it’s the firewall.
The page opens but I can’t sign in
You’re using HTTP without INSECURE=true. Enable it (step 7, option A) or set up HTTPS (option B).
The switch turns on but there’s no internet
51820/udpis closed — in ufw or the provider firewall. It’s UDP, not TCP.- The wrong host was entered in the setup wizard: configs must contain the server’s public IP/domain. Fix it in the admin area and download the
.confagain. - The client is disabled or expired in the panel — enable it or change the date.
- The VPS provider blocks non-standard UDP — try another port (change it both in the panel and in
portsindocker-compose.yml).
The app says the file is not valid
It needs a file with the .conf extension and [Interface] and [Peer] sections. Download it with “Download configuration” in the panel rather than copying text.
Forgot the admin password
Reset it from the server console (at least 12 characters; 2FA is reset too):
docker exec -it grafinya cli db:admin:resetThe image build fails or the server freezes
Most likely it ran out of memory while compiling. Add 1–2 GB of swap and run docker compose up -d --build again:
fallocate -l 2G /swapfile && chmod 600 /swapfile
mkswap /swapfile && swapon /swapfile
echo '/swapfile none swap sw 0 0' >> /etc/fstab
Still stuck? Open an issue on GitHub — attach the output of docker logs grafinya (without keys or passwords).